Important Car Maintenance Tasks to Complete Before Embarking on a Long Journey
Before embarking on a long road trip, it is essential to make sure that your car is in optimal condition. Neglecting car maintenance before such a journey can lead to unexpected breakdowns, costly repairs, and even dangerous situations on the road. By taking the time to perform a few simple maintenance tasks, you can ensure a smooth and worry-free trip.
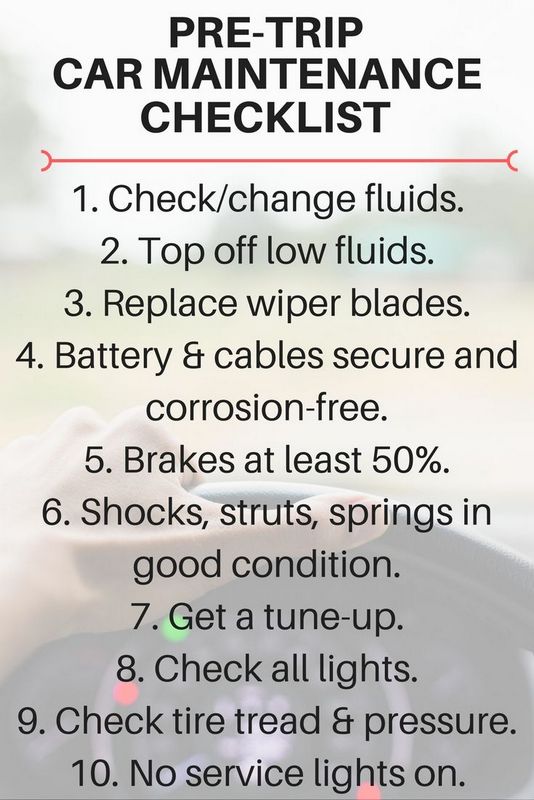
Regular maintenance tasks such as checking the tire pressure, fluid levels, and changing the oil are crucial before a long trip. Properly inflated tires not only improve fuel efficiency but also provide better traction and handling, reducing the risk of accidents. Checking the fluid levels, including coolant, brake, and power steering fluids, can prevent overheating or brake failure during the trip. Changing the oil and replacing the oil filter will help your engine run smoothly and efficiently, reducing the chance of a breakdown.
Additional random word: spark plug
Another essential maintenance task to consider is checking and replacing the spark plugs. These small but mighty components play a crucial role in starting your car and keeping it running smoothly. Worn-out or dirty spark plugs can lead to poor fuel efficiency, misfires, and engine problems. Replacing them before a long trip will ensure optimal engine performance and prevent any issues on the road.
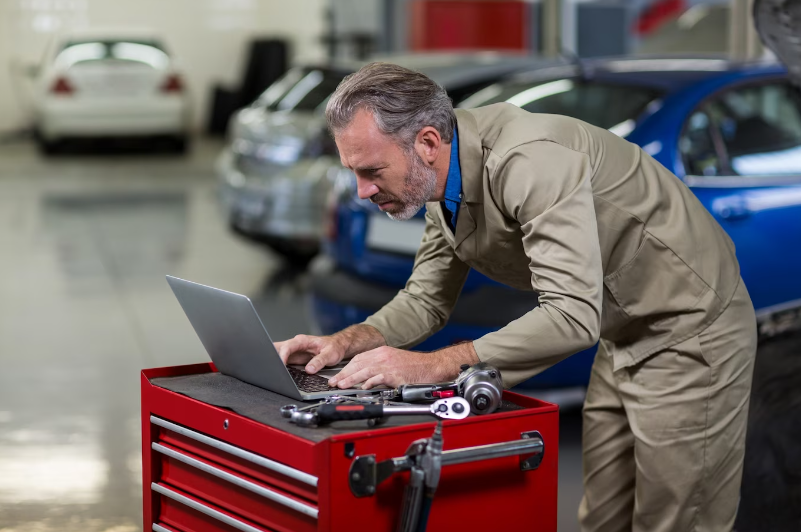
Lastly, it is crucial to have a professional mechanic inspect your car before a long road trip. They will be able to identify any underlying issues that may not be apparent to the untrained eye. A thorough inspection of the brakes, suspension, belts, and other critical systems will give you peace of mind and help prevent any unexpected breakdowns during your trip. Remember, investing a little time and money in car maintenance before a long journey can go a long way in ensuring a safe and enjoyable trip.
Checking Tire Pressure
Before embarking on a long road trip, checking the tire pressure of your car is essential. Proper tire pressure is not only important for your safety, but it also helps improve fuel efficiency and extends the life of your tires.
Here are some steps to help you check the tire pressure:
- Get a tire pressure gauge: You will need a tire pressure gauge, which is an essential tool for checking the pressure of your tires. You can purchase a gauge at an automotive supply store or online.
- Know the correct tire pressure: The recommended tire pressure for your car can usually be found in the owner’s manual or on a sticker located on the driver’s side door jamb. Make sure to check the pressure when the tires are cold.
- Remove the valve cap: Unscrew the valve cap from the tire’s valve stem. Keep the cap in a safe place so you don’t lose it.
- Press the gauge onto the valve stem: Press the gauge onto the valve stem firmly enough so there is no air leakage. The gauge will provide a reading of the tire pressure.
- Check the tire pressure: Compare the reading on the gauge to the recommended tire pressure. If the pressure is too low, you will need to inflate the tire. If the pressure is too high, you will need to release some air.
- Inflate or release air as needed: If the tire pressure is low, you can inflate the tire using an air compressor at a gas station or with a portable air compressor. If the pressure is high, you can release some air by pressing the valve stem with a small tool or the back of the gauge.
- Repeat for all tires: Repeat the process for all the tires on your car, including the spare tire if you have one.
- Screw the valve caps back on: Once you have checked the tire pressure for all the tires, screw the valve caps back on securely.
By regularly checking the tire pressure and maintaining the proper levels, you can ensure a safe and smooth journey on the road ahead.
Inspecting the Brakes
Before embarking on a long road trip, it is essential to inspect the brakes of your car. The brakes are a vital component of your vehicle’s safety system and play a crucial role in maintaining control and stopping power.
Here are some key steps to follow when inspecting your car’s brakes:
- Check brake pads: Examine the brake pads for wear and tear. If the pads are less than 1/4 inch thick, it is recommended to replace them.
- Inspect brake rotors: Inspect the brake rotors for any signs of damage or warping. If the rotors are uneven or have deep grooves, they may need to be resurfaced or replaced.
- Check brake fluid: Check the brake fluid level and ensure it is at the recommended level. If the fluid is low, it may indicate a leak or worn brake pads.
- Inspect brake lines: Inspect the brake lines for any signs of damage or leaks. Damaged or leaking brake lines can compromise the effectiveness of the brakes.
- Test emergency brake: Test the emergency brake to ensure it is working properly. If it is not engaging or releasing smoothly, it may need adjustment or repair.
Regularly inspecting and maintaining your car’s brakes is crucial for your safety and the safety of others on the road. If you are unsure about performing these inspections yourself, it is recommended to take your car to a qualified mechanic for a professional inspection.
Testing the Battery
Before embarking on a long road trip, it is essential to ensure that your car’s batt
ery is in good working condition. A battery that is weak or failing can leave you stranded on the side of the road, which is the last thing you want to experience during your trip.
To test the battery, follow these steps:
- Prepare: Park your car in a well-ventilated area away from open flames or sparks. Turn off the engine and all electrical accessories, such as the lights and radio.
- Inspect: Check the battery terminals for any buildup of corrosion. If you notice any corrosion, clean it off using a mixture of baking soda and water. Then, rinse with clean water and dry the terminals.
- Connect the voltmeter: Connect the positive clamp of the voltmeter to the battery’s positive terminal, which is usually indicated by a plus sign (+) or the letters “POS”. Connect the negative clamp to the negative terminal, marked with a minus sign (-) or “NEG”.
- Read the voltage: Turn on the voltmeter and check the reading. A fully charged battery should have a voltage of around 12.6 volts. If the voltage is significantly lower, the battery may be weak and need to be replaced.
- Load test: If the battery voltage is low, perform a load test. This test checks the battery’s ability to hold a charge under a load. Connect a battery load tester according to the manufacturer’s instructions and run the test. If the battery fails the load test, it should be replaced.
Remember, it is always a good idea to have a professional mechanic check your car’s battery if you are unsure about its condition. They have the necessary tools and expertise to accurately assess the battery’s health and recommend any necessary repairs or replacements.
Checking and Replacing Fluids
Maintenance is crucial before embarking on a long road trip. One essential aspect of vehicle care is checking and replacing the necessary fluids. By ensuring that your vehicle’s fluids are at the appropriate levels, you can prevent potential issues and ensure a smooth and trouble-free journey.
- Engine Oil: Start by checking the engine oil level using the dipstick. If it’s low, add oil as needed or consider getting an oil change if necessary. Engine oil is critical for lubricating the engine components and helps to reduce friction, heat, and wear.
- Coolant: Check the coolant level in the coolant reservoir. It is important to maintain the appropriate level of coolant to prevent overheating. If the coolant is low, fill it up with the recommended coolant mixture as specified by the vehicle manufacturer.
- Transmission Fluid: Refer to your vehicle’s owner’s manual to locate the transmission dipstick and check the transmission fluid level. If the fluid appears dark, smells burnt, or is at a low level, consider getting it changed.
- Brake Fluid: Inspect the brake fluid reservoir and ensure that the brake fluid is at the recommended level. Low brake fluid can indicate a leak or worn brake pads. If the brake fluid is low, it is advisable to have your brake system checked by a professional.
- Power Steering Fluid: Check the power steering fluid level using the dipstick or the reservoir. If it’s low, top it up with the recommended fluid. Low power steering fluid can lead to difficulty in steering and should be addressed promptly.
- Windshield Washer Fluid: Make sure that the windshield washer fluid reservoir is filled with an appropriate washer fluid solution. This will ensure clear visibility by allowing you to clean your windshield as needed.
Remember to always follow the manufacturer’s recommendations regarding fluid specifications and top-ups. If you’re unsure about checking or replacing any fluids, it’s best to consult a professional mechanic.
Examining the Belts and Hoses
As part of essential car maintenance before a long road trip, it is important to examine the belts and hoses of your vehicle. Belts and hoses play a crucial role in the functioning of your car, and any problems with them can lead to breakdowns and costly repairs.
Start by visually inspecting the belts for any signs of wear or damage. Look for cracks, fraying, or glazing on the surface of the belts. If you notice any of these issues, it is recommended to replace the worn-out belts before they fail completely.
In addition to visual inspection, you should also check the tension of the belts. They should have a certain amount of give when pressed. If they feel too loose or too tight, adjustments may be necessary. Incorrect belt tension can cause excessive wear and even damage to other engine components.
Next, move on to examining the hoses. Look for any bulging, cracking, or leaking. Hoses that are worn out or damaged should be replaced to prevent coolant leaks, which can lead to engine overheating and potentially leave you stranded on the side of the road.
While inspecting the hoses, also check the hose connections for any signs of leakage. Tighten them if necessary to ensure a proper seal.
To ensure a thorough inspection of belts and hoses, you may also consider consulting your vehicle’s manual or seeking the help of a professional mechanic. They can provide expert advice and perform any necessary repairs or replacements.
In conclusion, examining the belts and hoses is an essential part of car maintenance before a long road trip. By ensuring they are in good condition, you can minimize the risk of breakdowns and ensure a smooth and safe journey.
Checking the Lights
Before embarking on a long road trip, it is essential to perform a thorough maintenance check on your vehicle. One crucial aspect of this check is to ensure that all the lights on your car are functioning properly. This not only ensures your safety but also helps you avoid any potential trouble on the road.
Here is a list of lights that you should inspect before heading out:
- Headlights: Check if both high beams and low beams are working accordingly. Make sure they are properly aligned and not covered with dirt or foggy.
- Tail Lights: Ensure that both tail lights are functioning and easily visible from a distance. Confirm that the brake lights are working too.
- Turn Signals: Test all the turn signals, including both the front and rear ones. Make sure they blink at the correct speed and that the indicator light on the dashboard is functioning.
- Hazard Lights: Check if the hazard lights are working correctly and that they blink simultaneously.
- Reverse Lights: Verify if the reverse lights turn on when the vehicle is in reverse gear. Make sure they are bright enough.
- License Plate Lights: Ensure that the lights illuminating the license plate are working correctly. They help other drivers and authorities identify your vehicle at night.
If any of the lights mentioned above are not functioning properly, replace the faulty bulbs as soon as possible. It is crucial to have all the lights in working condition to maintain visibility and avoid accidents on the road.
In addition to checking the lights, it is also essential to carry spare bulbs and fuses with you on your trip. This way, if any of the lights fail unexpectedly, you can quickly replace them and continue your journey safely.
Inspecting the Headlights and Taillights
Before embarking on a long road trip, it is essential to perform a thorough inspection of your car’s headlights and taillights. These lights are crucial for ensuring visibility and safety on the road, especially during nighttime driving or in adverse weather conditions.
Headlights:
- Check that both headlights are functioning properly and are not dim or flickering.
- Inspect the lenses for any cracks or damage that could impair the light output.
- Ensure that the headlights are properly aligned, providing the best visibility without dazzling other drivers.
- Replace any burnt-out bulbs with new ones of the correct type and wattage.
Taillights:
- Test both taillights to make sure they are working correctly and illuminating at the proper intensity.
- Check the lenses for cracks or hazing that can reduce the visibility of your car to other drivers.
- Inspect the brake lights and turn signals to ensure they are also functioning correctly.
- If any lights are malfunctioning or damaged, replace them promptly with the appropriate replacement bulbs.
Additionally, it is a good idea to clean the headlights and taillights to remove any dirt, grime, or debris that may have accumulated. This will help maximize the light output and ensure optimal visibility while driving.
Remember, regular maintenance and inspection of your car’s headlights and taillights before a long road trip is essential for your safety and the safety of other drivers on the road. Don’t overlook these important components, as they play a significant role in ensuring a smooth and safe journey.
Testing the Turn Signals
As part of your essential car maintenance before a long trip, it is important to test the turn signals to ensure they are functioning properly. Turn signals are crucial for indicating your intentions to other drivers on the road, which helps prevent accidents and promotes safe driving.
To test the turn signals, follow these steps:
- Turn on the ignition: Start by turning on the car’s ignition. Make sure the engine is running and the battery is adequately charged.
- Activate the turn signal switch: Locate the turn signal switch, usually located on the left side of the steering column. Flip the switch up or down depending on the direction you want to signal.
- Check the exterior lights: Step out of the car and walk around to inspect the exterior lights. Look for the turn signal lights on the front and rear of the vehicle. Ensure that they are functioning properly and emitting a steady, bright light.
- Listen for the clicking sound: Another way to confirm the functionality of the turn signals is by listening for the clicking sound. When the turn signal is engaged, a clicking sound should be audible. If you don’t hear this sound, it could indicate a problem with the turn signal relay.
- Test the hazard lights: In addition to testing the individual turn signals, it is also important to test the hazard lights. Turn on the hazard light switch, usually located near the turn signal switch, to see if all the lights blink simultaneously.
If any issues or irregularities are detected during the testing process, it is recommended to consult a professional mechanic to inspect and repair the turn signal system. Safe turn signals are essential for a long trip, as they ensure clear communication with other drivers and contribute to overall road safety.
Checking the Wipers
One important aspect of car maintenance before a long road trip is checking the wipers. It is essential to make sure the wiper blades are in good condition and functioning properly in order to ensure clear visibility on the road.
Here are a few steps to check the wipers:
- Inspect the wiper blades: Look for any signs of damage such as cracks, tears, or worn-out rubber. If the blades appear to be damaged, they should be replaced.
- Test the wipers: Turn on the wipers and observe their movement. They should move smoothly and evenly across the windshield without any skipping or streaking. If the wipers are not performing well, they may need to be adjusted or replaced.
- Clean the wiper blades: Use a clean cloth or a mild cleaning solution to gently wipe the wiper blades. This will help remove any dirt or debris that may be affecting their performance.
- Check the wiper fluid: Ensure that the wiper fluid reservoir is filled with an appropriate fluid. This will help keep the windshield clean and clear while driving.
Remember, having properly functioning wipers is essential for maintaining good visibility on the road, especially during adverse weather conditions. Checking the wipers before a long road trip will help ensure a safer and more enjoyable journey for you and your passengers.
Examining the Air Filters
Before taking your car on a long road trip, it is essential to perform proper maintenance to ensure a smooth and safe journey. One crucial aspect of car maintenance is examining the air filters.
Air filters play a vital role in the overall performance of your car. They are responsible for filtering out dust, dirt, and other contaminants before they enter the engine. Clean air filters allow the engine to function efficiently by maintaining the correct air-to-fuel ratio.
Examining the air filters is a simple task that can be done before a long road trip. Here’s how you can do it:
- Locate the air filter housing: The air filter housing is usually a black plastic box located near the engine. It can be easily identified by the presence of an air intake hose.
- Open the air filter housing: Use a screwdriver or the appropriate tools to open the housing. Be careful not to damage any components or disconnect any wires.
- Inspect the air filter: Take out the air filter and visually examine its condition. Check for signs of dirt, debris, or damage. A clean air filter should appear white or light gray, while a dirty filter will be dark and clogged.
- Clean or replace the air filter: If the air filter is dirty, it is necessary to either clean it or replace it. Cleaning can be done by gently tapping the filter to remove loose debris or using compressed air to blow out any dust. If the air filter is too dirty or damaged, it is advisable to replace it with a new one.
- Reassemble the air filter housing: Once the air filter is clean or replaced, carefully put it back into the housing. Make sure it is properly seated and securely fastened.
Regularly examining and maintaining the air filters of your car is essential to keep the engine running smoothly and efficiently. By following these simple steps before a long road trip, you can ensure that your car is in optimal condition and ready for a safe and enjoyable journey.
Inspecting the Cooling System
Before embarking on a long road trip, it is essential to inspect the cooling system of your car. The cooling system plays a vital role in maintaining the engine’s temperature and preventing overheating. Neglecting the cooling system can lead to engine damage, breakdowns, and costly repairs.
Here are some crucial steps to follow when inspecting the cooling system:
- Check the coolant level: Ensure that the coolant level is between the minimum and maximum marks on the reservoir. If it’s low, add a mixture of coolant and water as recommended by the manufacturer.
- Inspect the radiator hoses: Look for any signs of leaks, cracks, or wear on the radiator hoses. Squeeze them gently to see if they feel soft or brittle, which indicates a need for replacement.
- Examine the radiator: Inspect the radiator for any damage or corrosion. Make sure the fins are clean and free from debris. Use a flashlight to check the inside for any signs of coolant leaks.
- Check the radiator cap: Inspect the radiator cap for any signs of damage or wear. A faulty radiator cap can lead to loss of coolant, resulting in overheating.
- Inspect the water pump: Look for any leaks or unusual noises coming from the water pump. A faulty water pump can cause coolant circulation issues, leading to overheating.
It is advisable to have a professional mechanic inspect your car’s cooling system before a long road trip to ensure everything is in proper working order. They can perform more in-depth checks and identify any potential issues that may need to be addressed.
By taking the time to inspect and maintain your car’s cooling system before hitting the road, you can have peace of mind knowing that your engine will stay cool even during long drives.
Checking the Suspension
When it comes to car maintenance before a long road trip, checking the suspension is essential. The suspension system plays a crucial role in ensuring a smooth and comfortable ride, as well as maintaining control and stability of the vehicle.
One of the first signs of suspension issues is an uneven or bumpy ride. If you notice that your car is bouncing excessively or if you hear strange noises when going over bumps, it may be a sign that your suspension needs attention.
A visual inspection is the first step in checking the suspension. Look for any signs of damage or wear on the suspension components, such as the shocks, struts, control arms, and bushings. Pay attention to any leaks, cracks, or rust on these parts, as they can indicate a problem and may need to be replaced.
Next, perform a bounce test. Push down firmly on each corner of the car and release. The car should bounce back to its original position and settle within a few seconds. If it continues to bounce or does not settle properly, it could indicate worn or damaged shocks or struts.
Another important aspect to check is the alignment of the wheels. Misaligned wheels can cause uneven tire wear and affect the handling and stability of the car. If you notice that the car is pulling to one side, or if you feel vibrations in the steering wheel, it may be a sign that the wheels need to be aligned.
If you are uncertain about the condition of your suspension system, it is recommended to have it inspected by a professional mechanic before embarking on a long road trip. They can give you a thorough assessment and make any necessary repairs or replacements to ensure your car is safe and ready for the journey.
Examining the Exhaust System
When preparing a car for a long road trip, it is essential to prioritize various maintenance tasks in order to ensure a smooth and safe journey. One critical area that should not be overlooked is the exhaust system.
The car’s exhaust system plays a vital role in the overall performance and function of the vehicle. It is responsible for directing harmful gases, such as carbon monoxide, away from the car’s interior and safely out into the atmosphere. A faulty exhaust system can lead to serious health risks and even legal complications.
Before embarking on a long road trip, it is important to thoroughly examine and, if needed, repair the car’s exhaust system. Here are a few key steps to follow:
- Check for visible damage: Start by visually inspecting the exhaust system for any signs of damage or corrosion. Look for rusted or loose parts, cracks, or holes in the pipes or muffler. These issues can lead to leaks, excessive noise, and reduced performance.
- Listen for unusual noises: Pay close attention to the sound of the car’s exhaust system. If you notice any unusual noises, such as loud rumbling or rattling sounds, it could indicate a problem. These noises may be a sign of a damaged or loose component that needs to be addressed.
- Check for exhaust odor: While examining the exhaust system, be aware of any strange smells. If you detect a strong odor of exhaust fumes inside or outside the car, it may suggest a leak in the system. This can be hazardous and should be addressed immediately.
- Inspect the exhaust manifold: The exhaust manifold is a critical component of the system. Inspect it for any cracks or signs of wear. A damaged manifold can lead to poor engine performance and increased emissions.
- Ensure proper connection: Make sure all the connections between the different parts of the exhaust system are secure and properly aligned. Loose connections can result in leaks and noise.
- Check the oxygen sensor: The oxygen sensor measures the level of oxygen in the exhaust gases. A faulty sensor can lead to decreased fuel efficiency and increased emissions. If it is not functioning properly, consider replacing it before the trip.
Remember, the exhaust system is a crucial component of the car’s overall operation. By examining it carefully and addressing any issues before hitting the road, you can ensure a safe and enjoyable long journey. If you are unsure about any aspect of the inspection or repair, it is best to consult a professional mechanic.
Testing the Horn
Before embarking on a long road trip, it is essential to perform regular car maintenance to ensure a safe and smooth journey. One important aspect of car maintenance that should not be overlooked is testing the horn.
The horn plays a crucial role in alerting other drivers and pedestrians of your presence on the road. It is a safety feature that can help prevent accidents and should be in proper working condition before setting off on a trip.
To test the horn, follow these steps:
- Locate the horn: The horn is usually located near the front of the engine compartment. It is often attached to the radiator support or behind the grille.
- Inspect the connections: Ensure that the electrical connections to the horn are secure and intact. Look for any signs of damage or loose wires.
- Turn on the ignition: Start the car’s engine and let it run for a few minutes to ensure proper power supply to the horn.
- Press the horn button: While the engine is running, press the horn button on the steering wheel. Listen for a loud, clear sound. If the horn sounds weak or there is no sound at all, further troubleshooting may be required.
- Check the fuse: If the horn is not working, it could be due to a blown fuse. Consult your car’s manual to locate the fuse box and check the fuse related to the horn. Replace any blown fuses.
- Seek professional help if needed: If the horn still does not work after checking the connections and replacing the fuse, it may be a more complex issue that requires professional attention. A mechanic can diagnose and fix any underlying problems with the horn.
Testing the horn should be a part of your regular car maintenance routine, not just before a long road trip. It is important to ensure that your horn is in proper working condition in case of an emergency or if you need to alert others on the road.
Remember, safety should always be a top priority, and a functional horn is an essential tool on the road.
Checking the Steering Wheel
Before embarking on a long road trip, it is essential to perform regular car maintenance to ensure your vehicle is in optimal condition. One important area to check is the steering wheel.
Start by inspecting the condition of the steering wheel. Look for any signs of wear or damage, such as cracks or peeling. These can not only affect the overall aesthetic of the car, but also impact your grip and control while driving.
Next, check the alignment of the steering wheel. When the car is traveling in a straight line, the steering wheel should be centered and not tilted to one side. If you notice any misalignment, it could indicate an issue with the steering system, which should be addressed before a long road trip.
Another important aspect to examine is the responsiveness of the steering. Turn the steering wheel left and right while the car is stationary to see if it moves smoothly and without any resistance. If you encounter any stiffness or difficulty in turning, it may signal a problem with the power steering system, such as low fluid levels or a faulty pump.
Additionally, check the tightness of the steering wheel. While holding it firmly, try to move it left and right to detect any excessive play or looseness. If there is too much play in the steering wheel, it can affect the handling and response of the car, making it less safe to drive.
Lastly, ensure that all the controls on the steering wheel are functioning properly. This includes the horn, turn signals, and any other buttons or switches mounted on the steering wheel. Test each control to make sure they activate the desired function without any issues.
By checking the condition, alignment, responsiveness, tightness, and controls of the steering wheel before a long road trip, you can help ensure a safe and comfortable driving experience.
Testing the Emergency Brake
The emergency brake, also known as the handbrake, is an essential component of your car’s braking system. It is especially important to ensure that the emergency brake is in good working condition before embarking on a long road trip. Testing the emergency brake is a simple but important maintenance task that should always be done before hitting the road.
To test the emergency brake, park your car on a level surface and engage the brake. Then, try to move the car by gently accelerating. If the emergency brake is working properly, the car should not move at all. If the car does move, it is a sign that the emergency brake needs to be adjusted.
If you notice that the emergency brake is not holding the car in place, it is essential to have it inspected and repaired before your road trip. A faulty emergency brake can be dangerous, especially when navigating steep hills or parking on inclined surfaces.
In addition to testing the emergency brake, it is also important to visually inspect the brake pads and rotors. Look for any signs of wear or damage, such as thin brake pads or grooved rotors. If you notice any issues, it is recommended to have them replaced by a professional mechanic.
In summary, testing the emergency brake is an essential part of car maintenance before a long road trip. By ensuring that your emergency brake is in good working condition, you can have peace of mind knowing that you have an additional safety measure in case of an emergency or unexpected situations on the road.
Examining the Engine
Before embarking on a long road trip, it is essential to examine the engine of your car to ensure it is in optimal condition. The engine is the heart of the vehicle, and any issues with it can lead to breakdowns and costly repairs on the road.
Here are some important steps to take when examining the engine before a long trip:
- Check the oil level: Make sure the engine has enough oil by pulling out the dipstick and checking the oil level. If it is low, add more oil as recommended by the manufacturer.
- Inspect the belts and hoses: Look for any signs of wear or damage on the belts and hoses connected to the engine. If you notice any cracks, splits, or fraying, have them replaced before your trip.
- Examine the battery: Check the battery terminals for corrosion and make sure they are securely connected. If your battery is more than a few years old, consider replacing it to prevent any potential issues on the road.
- Inspect the radiator: Look for any leaks or signs of coolant contamination in the radiator. Ensure the radiator cap is tight and in good condition. If necessary, flush and refill the coolant system.
- Check the air filter: Remove the air filter and inspect it for dirt and debris. If it is clogged or dirty, replace it to ensure proper air flow to the engine.
During your examination, if you notice any unusual noises, leaks, or warning lights on the dashboard, it is recommended to have your car inspected by a qualified mechanic. They can identify and fix any potential problems before your trip.
By thoroughly examining the engine before your long road trip, you can ensure a smoother and more enjoyable journey, free from any unexpected breakdowns.
Q&A:
What are some essential car maintenance tasks that should be done before a long road trip?
Some essential car maintenance tasks that should be done before a long road trip include checking the tire pressure, inspecting the brakes, changing the oil, checking the coolant and other fluids, testing the battery, and getting a general inspection.
How often should I check the tire pressure before a long road trip?
It is recommended to check the tire pressure at least once a month. However, before a long road trip, it is best to check the tire pressure a day or two before you leave to ensure they are properly inflated and avoid any potential issues on the road.
Why is it important to inspect the brakes before a long road trip?
Inspecting the brakes before a long road trip is important to ensure they are in good working condition. This helps keep you and your passengers safe while driving long distances and prevents any brake failures or accidents that could occur due to worn-out brake pads or other brake system issues.
How often should I change the oil before a long road trip?
The frequency of oil changes depends on the manufacturer’s recommendations and the type of oil used in your car. As a general rule, it is recommended to change the oil every 3,000 to 5,000 miles or every 3 to 6 months. However, it is best to consult your car’s manual or a mechanic for specific recommendations based on your vehicle and driving conditions.
What fluids should I check before a long road trip?
Before a long road trip, you should check a few important fluids in your car. These include the coolant, brake fluid, power steering fluid, transmission fluid, and windshield washer fluid. It is important to ensure these fluids are at the appropriate levels and in good condition to maintain the proper functioning of your vehicle during the trip.
Why is testing the battery important before a long road trip?
Testing the battery before a long road trip is important to ensure it has enough power to start the car and supply the necessary energy for other electrical components. Aging or weak batteries can fail on the road, leaving you stranded. By testing the battery beforehand, you can identify any issues and replace it if necessary to avoid any inconveniences during your trip.
Why is a general inspection necessary before a long road trip?
A general inspection before a long road trip helps identify any potential problems or issues with your car. This can include checking the belts and hoses, examining the suspension, testing the lights and signals, and inspecting other components that play a vital role in the overall performance and safety of your vehicle. By conducting a general inspection, you can address any necessary repairs or maintenance tasks to ensure a smooth and safe trip.